
Learn the
iPad,
at your pace.
Seven short modules built for first-time iPad owners. Read the lesson, watch a quick video, try it on your iPad, then move on. No prior tech experience needed. No teacher needed.
Seven
70 to 84 min
iPad (A16, 11th Gen)
Before you start
Have your iPad in front of you. That is the most important thing. This course is built around doing, not just reading. Every section asks you to try something on your own device, and the lessons stick faster that way.
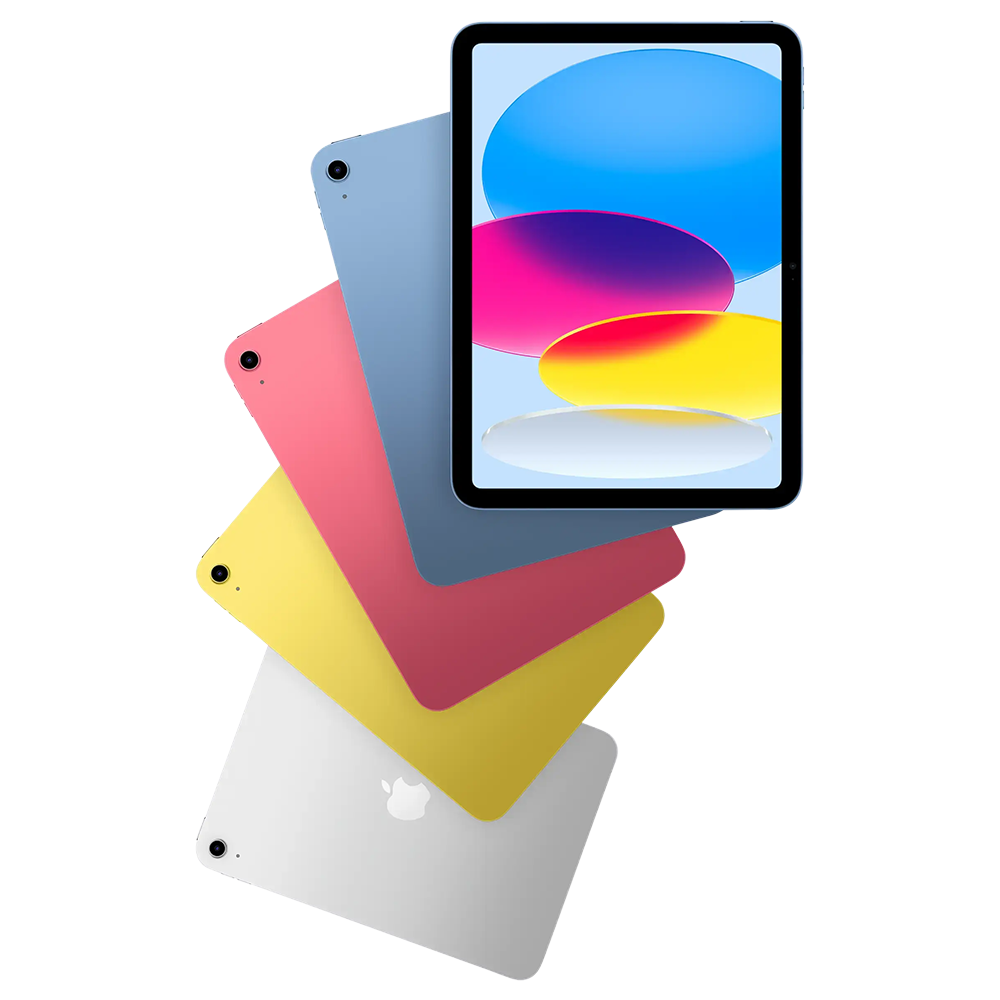
The device used in this course is the iPad (A16), Apple’s 11th generation base iPad released in March 2025. It has an 11-inch screen, no physical Home button, and a USB-C charging port. Everything is done through the touchscreen and a few simple finger movements (gestures).
Take your time. There is no quiz, no clock, and nothing here that you can break by tapping the wrong button. If a step does not work the first time, try it again. If you need to walk away and come back later, the page will be right where you left it.
How this works
Every module follows the same four-step rhythm. Once you have done one, the rest feel familiar.
- 01Read the module
Each module is short. Read the lesson sections at your own pace. Re-read whatever you need to.
- 02Watch the short video
Every module has one video that shows you exactly what the lesson is talking about. Two minutes or less, usually.
- 03Try it on your iPad
Stop and try each step on your own iPad as you go. Reading without doing does not stick.
- 04Check yourself
Each module ends with a short “Your Turn” list. Run through it before moving on.
Your course at a glance
Seven modules. Each one stands on its own. Together they cover everything you need to feel comfortable with a brand-new iPad in your first week.
Meet Your iPad: Buttons, Ports & Waking It Up
The Home Screen & Your First Gestures
Opening, Switching & Closing Apps
Control Center & the Status Icons
Connecting to Wi-Fi
Make It Yours: Brightness, Text Size & Sound
When Something Goes Wrong: Simple Fixes
Meet Your iPad: Buttons, Ports & Waking It Up
Before any app or any swipe, get to know the device in your hands. In this first module you will pick up the iPad, learn what every button and port does, and practice waking it and putting it back to sleep.
By the end of this module you will be able to find the Top button (which doubles as Touch ID), the volume buttons, the USB-C charging port, and the Home indicator bar. You will wake, lock, and orient the iPad on your own.
Step through it with your iPad in hand
What an iPad Is
An iPad is a flat computer that you control with your fingers. There is no mouse and no keyboard required. The whole front of it is the screen.
Pick up your iPad now. Use two hands if that feels safer. There is no need to grip it tightly.
One thing to notice right away: this iPad has no Home button. There is no physical button at the bottom of the screen. Everything happens by touching the screen itself.
The Buttons
Hold the iPad in front of you and find each of these as you read:
- Top-right edge: the Top button. This wakes and locks the iPad. It also has the fingerprint sensor (Touch ID) built into it.
- Left edge: two volume buttons. The top one raises volume, the bottom one lowers it.
- Bottom edge: the USB-C port. The charging cable plugs in here.
- Front camera: it sits on the long edge (the side), not the top, so the camera is centered for video calls when you hold the iPad sideways.
That is every physical button and port on this device. Everything else happens on the screen.
Wake the iPad
Press the Top button once. The screen lights up. That is the iPad waking up.
Press it again and the screen goes dark. That is putting it to sleep.
Go ahead and try this two or three times before moving on. There is nothing here you can break.
The Home Indicator
Look at the very bottom of the screen and find the thin black bar. That is called the Home indicator. It is not a button. You cannot press it. Think of it as a target for your finger. In the next module you will learn how to use it to get back to the main screen from anywhere.
Holding It Comfortably
There are two grip styles most people use: one hand on the side with the other free to tap, or both hands on the sides. Try rotating the device, the screen will follow.
Most people find landscape (sideways) easier for reading and video calls. Portrait (tall) is good for browsing or taking notes. Either is fine. Pick whatever feels natural.
Charging Port
Find the USB-C cable that came with the iPad. The smaller end goes into the port at the bottom of the device. It plugs in either way around, so you cannot put it in wrong.
When the iPad is charging, a small lightning bolt appears on the battery icon at the top of the screen.
A quick note about the cable: this iPad uses USB-C, not the older Lightning cable. If you have an older iPhone cable lying around, it will not fit.
Your Turn
Run through the checklist below on your own iPad before moving on. If something does not work the first time, try it again, you cannot break anything.
The Home Screen & Your First Gestures
This module covers the four finger movements (gestures) you will use every single day on the iPad. Once these feel comfortable, almost everything else on the device is a variation of what you learn here.
By the end of this module you will recognize the Home Screen, the Dock, and app icons. You will be able to tap, swipe sideways, swipe up to go Home, and long-press.
Step through it with your iPad in hand
What You Are Looking At
When the iPad wakes up, you land on the Home Screen. The rows of little pictures are called apps. The strip at the very bottom is called the Dock.
Think of the Home Screen as the front porch of the iPad. No matter where you wander off to, you can always come back here.
Gesture #1: Tap
Tap means touch the screen quickly with one finger and lift off. That is how you open anything on the iPad.
Try it now: find the Settings app (the gray gear icon) and tap it once. The Settings app opens.
Gesture #2: Swipe Up to Go Home
This is the most important gesture on this iPad, since there is no physical Home button.
Place your finger on the thin black bar at the very bottom of the screen and slide your finger straight up. The current app shrinks away and you are back on the Home Screen.
Practice this three times right now. Open Settings, swipe up to go Home. Open Settings again, swipe up to go Home. One more time. Saying it out loud (“swipe up from the bottom”) helps it stick.
Gesture #3: Swipe Sideways
Slide your finger left or right across the Home Screen and you will move between pages of apps.
See the small dots near the bottom of the screen? Those tell you which page you are currently on. Swipe back the other way to return.
Gesture #4: Long Press
Touch any app icon and hold your finger there. Do not lift it. After about a second, a small menu appears. That is a long press.
You will not need this every day, but it is good to know it exists. Tap an empty space on the screen to dismiss the menu when you are done.
Your Cheat Sheet
The video for this module shows a reference card with all four gestures together. Feel free to take a screenshot or write them down somewhere you can find later. You will be using these for the rest of the course.
Your Turn
Three apps, three trips home. Did you make it back each time? Walk through the checklist below and only move on once each step works smoothly.
Opening, Switching & Closing Apps
This module builds straight on the gestures from Module 1.2. You will meet the App Switcher and clear up something that confuses a lot of new iPad owners: you do not need to close apps after every use.
By the end of this module you will open an app, switch between two recent apps, see all your open apps in the App Switcher, and close an app by flicking it off the screen.
Step through it with your iPad in hand
Open an App
Quick recap from Module 1.2: tap any icon to open an app, and swipe up from the bottom bar to go Home. Try it once before continuing.
Switch Between Two Apps
Open Notes, then go Home. Open Safari, then go Home. Now try this trick: swipe sideways along the very bottom edge of the screen, right on that thin black bar.
You will jump straight back to Notes. Swipe the other way and you are back to Safari. This is the fastest way to bounce between two things you are working on.
See All Open Apps (App Switcher)
Place your finger on the Home indicator bar at the bottom and swipe up. This time, pause halfway and hold for a second.
All your recent apps appear as cards. This is called the App Switcher. Tap any card to jump to that app.
Give yourself a few tries. The motion (“swipe up and pause”) is a little different from the regular go-Home swipe (“swipe up all the way”).
Closing an App
While you are in the App Switcher, flick a card upward, off the top of the screen. That app is now closed.
Important: you do not need to do this for every app. Only close an app if it is frozen or not working right.
Leave vs. Close: The Difference
This trips up almost everyone, so it is worth understanding clearly:
- Going Home leaves the app running quietly in the background. The iPad takes care of it. It does not waste battery.
- Closing an app fully removes it from memory.
- Most days you will never need to close an app.
If someone has told you to “always close your apps”, you can let that habit go. Your iPad is built to handle it for you.
Practice Flow
Walk through this sequence on your own:
- 01Open Settings
- 02Go Home
- 03Open Photos
- 04Go Home
- 05Swipe left and right along the bottom bar to switch between the two
- 06Open the App Switcher and close one of them
Recap
Two motions to remember from this module:
- Swipe up all the way = go Home.
- Swipe up and pause = open the App Switcher.
Same starting point, different ending. Practice the difference until it feels natural.
Control Center & the Status Icons
Control Center is the one panel you will reach for almost every day. It lives in the top-right corner of the screen and gives you fast access to brightness, volume, Wi-Fi, mute, and more.
By the end of this module you will be able to open Control Center, identify the Wi-Fi, battery, volume, and brightness icons, and toggle airplane mode, brightness, volume, and silent mode.
Step through it with your iPad in hand
Status Icons at the Top
Glance at the top of the screen. The time is on the left. On the right you will see your Wi-Fi signal and the battery level. These are called status icons. They are there to tell you what is going on. You do not tap them.
- Fan-shaped icon = Wi-Fi signal strength
- Battery bar = how much charge is left
- Sometimes a percentage appears next to the battery
Open Control Center
Place your finger in the very top-right corner of the screen, near the battery icon, and swipe down. A panel slides out. That is Control Center.
To close it, swipe up from the bottom or tap any empty space outside the panel. Open and close it a couple of times until the swipe feels natural.
Brightness and Volume
Inside Control Center you will see two tall sliders. The sun icon controls brightness, and the speaker icon controls volume.
Drag a slider up to increase, drag it down to decrease. The screen and the sound respond right away, so you can see and hear what works for you.
Wi-Fi, Bluetooth, and Airplane Mode
In the top-left area of Control Center is a group of round buttons:
- Airplane icon: turns off all wireless connections at once
- Wi-Fi icon: turns Wi-Fi on or off
- Bluetooth icon: turns Bluetooth on or off
- AirDrop icon: controls wireless file sharing with nearby Apple devices
Blue means it is on. Gray means it is off. Tap once to toggle.
Mute / Silent Mode
The bell icon puts the iPad on silent. Tap it once and the iPad will not make any sound. Tap it again to turn sound back on.
Use this before church, a doctor’s appointment, or at night when you do not want notifications waking you up.
Customizing Control Center (Optional)
If you ever want to add more controls to Control Center, you can do that through Settings. That is optional and not part of this module. The defaults cover everything you need right now.
Your Turn
Run through the checklist on your own iPad before moving on.
Connecting to Wi-Fi
Without Wi-Fi, the iPad cannot do most of what makes it useful. This module walks you through joining a home or community network for the first time. The good news: it is just four taps.
By the end of this module you will open Settings, find the Wi-Fi menu, join a network with a password, confirm you are connected, and forget a network you no longer use.
Step through it with your iPad in hand
Open Settings
On the Home Screen, find the gray gear icon. That is Settings. Tap it. If you cannot find it on your first page of apps, swipe sideways to check the next page.
Find the Wi-Fi Menu
In the list on the left side of Settings, near the top, you will see Wi-Fi. Tap it. The right side of the screen now shows your Wi-Fi options.
Turn Wi-Fi On
There is a switch at the top of the Wi-Fi screen. If it is green, Wi-Fi is already on. If it is gray, tap it once to turn it on.
A list of nearby networks will appear below.
Pick Your Network
Find the name of your home Wi-Fi in the list and tap it.
Not sure what your network is called? The name is usually printed on the underside of your router, the box that sends out your internet signal at home.
Type the Password
When you tap the network name, a box appears asking for the password. The keyboard slides up from the bottom of the screen.
Type carefully. Wi-Fi passwords are case-sensitive, which means capital letters matter. The shift key (the upward-pointing arrow on the left side of the keyboard) lets you switch between capital and lowercase.
When you are done, tap Join on the keyboard.
How You Know It Worked
Two signs confirm you are connected:
- A blue checkmark appears next to your network’s name.
- At the very top of the screen, the Wi-Fi icon is now solid and filled in.
If you see both of those, you are online.
Forgetting a Network
If you ever want the iPad to stop connecting to a network, say, an old coffee shop you no longer visit, tap the small (i) next to that network’s name, then tap Forget This Network and confirm.
Important: do not tap Forget on a network you still use at home. If you do, you will need to type the password again to reconnect.
Your Turn
Try it now:
- 01Open Settings
- 02Go to Wi-Fi
- 03Confirm you are connected (look for the checkmark and the solid Wi-Fi icon at the top of the screen)
- 04Tap the (i) next to your network and look around, but do not tap Forget
Make It Yours: Brightness, Text Size & Sound
These are the first comfort settings to change on a brand-new iPad. Quick wins that make the device feel personal and easier on your eyes and ears. An iPad that fits you is one you will actually pick up and use.
By the end of this module you will adjust display brightness, increase text size for readability, set the volume, and turn on Dark Mode.
Step through it with your iPad in hand
Brightness from Settings
Open Settings and tap Display & Brightness. Drag the slider to the brightness you like.
Brighter is good in daylight or near a window. Dimmer is easier on your eyes at night or in a dark room.
Light Mode vs. Dark Mode
On the same Display & Brightness screen, you will see two preview tiles: Light and Dark. Tap one to try it.
Dark Mode makes the background of the screen dark and is easier on the eyes at night. Light Mode is the default and works well in most lighting.
There is no wrong answer. Try both, pick whichever feels comfortable, and know you can switch back at any time.
Text Size
Still in Display & Brightness, tap Text Size. Drag the slider to the right to make all the text on the iPad bigger.
Most apps respect this setting. Do not be shy with it: bigger is better than squinting. You can always come back and adjust it later.
Bold Text
On the same screen there is a Bold Text switch. Turn it on. The letters get thicker and easier to read at a glance. Many people leave this on all the time.
Volume
There are two ways to change volume:
- The buttons on the left edge of the iPad (faster for a quick adjustment).
- The slider in Control Center (handy when you are already in there for something else).
Try both. Find the level that is comfortable in the room you are in.
One thing to know about this device: there is no headphone jack. To listen with headphones or earbuds, you will need either wireless (Bluetooth) headphones or a USB-C adapter for wired ones.
Wallpaper (Optional)
Want a different background image on your Home Screen? Open Settings, tap Wallpaper, then tap Add New Wallpaper and pick from the built-in photos.
Optional but a nice personal touch.
Your Comfort Checklist
Walk through the first-day comfort settings below. Take your time on each one. These small choices add up to an iPad that feels like yours.
When Something Goes Wrong: Simple Fixes
This is your safety-net module. It covers the three things that fix nine out of ten common iPad problems. Stay calm. None of this is dangerous, and most of it you can do without anyone’s help.
By the end of this module you will force-quit a frozen app, restart the iPad, check the charge, and recognize the moments when it is smart to ask for help.
Step through it with your iPad in hand
An App Froze: Close It
If an app stops responding, do not panic. Swipe up from the bottom and pause to open the App Switcher (you practiced this in Module 1.3).
Find the frozen app’s card and flick it up off the screen. Then open the app again. Most of the time it works fine on the second try.
The Whole iPad Is Sluggish: Restart It
Restarting fixes more iPad problems than anything else. Here is how to do it:
- 01Press and hold the Top button (top-right edge) and either volume button (left edge) at the same time.
- 02A slider appears that says “slide to power off”. Drag it to the right.
- 03Wait for the screen to go fully dark.
- 04Press and hold the Top button until the Apple logo appears.
- 05The iPad has restarted.
If something feels off and you are not sure why, this is the first thing to try.
Battery Is Low: Charge It
If the battery icon in the top-right corner is red, the iPad needs to be plugged in. Use the USB-C cable that came with it.
Plug the smaller end into the port at the bottom of the iPad and the larger end into the wall adapter. A small lightning bolt appears on the battery icon. That means it is charging.
You can keep using the iPad while it charges. And remember: this device uses USB-C, not the older Lightning cable. If the cable does not slide in easily, it is the wrong one. Do not force it.
Wi-Fi Stopped Working
Open Control Center (swipe down from the top-right corner). Tap the Wi-Fi button to turn it off. Wait two seconds. Tap it again to turn it back on.
Most Wi-Fi hiccups are fixed by that simple toggle. Still stuck? Restart the iPad using the steps above.
I Tapped Something and Now I Am Lost
If you ever feel lost inside an app or buried in Settings, fall back on the gesture you have practiced the most: swipe up from the bottom to go Home.
You can always start fresh from the Home Screen. Nothing is broken, and nothing is permanent.
When to Ask for Help
Some things are beyond a fix-it-yourself moment. If the screen is cracked, the iPad will not turn on at all, or you see a screen asking for an account password you do not recognize, that is the moment to ask a trusted person or visit an Apple Store.
Knowing when to stop and ask for help is a skill, not a failure.
You Did It
You can hold an iPad, wake it, navigate the Home Screen, switch apps, open Control Center, connect to Wi-Fi, make it comfortable, and fix the most common problems.
Your final challenge: run through all seven module skills below in order, without the videos. If anything trips you up, scroll back to that module and refresh your memory. You did it once, you can do it again.
Nicely done.
You know your iPad now.
The fastest way to keep what you just learned is to use the iPad every day, even just a few minutes at a time. Check the weather. Send a message. Open a photo. Whatever feels useful. The rest will follow.