
Go further
with the
iPad you have.
Seven new modules for people who finished the first course and want to do more with the device. Browse the web, take photos, use Maps and Calculator, and sign into Gmail — all without needing an Apple ID. Same rhythm as before: read, watch, try, check.
Recommended PrerequisiteCourse One · Intro to iPadSeven
75 to 90 min
iPad (A16, 11th Gen)
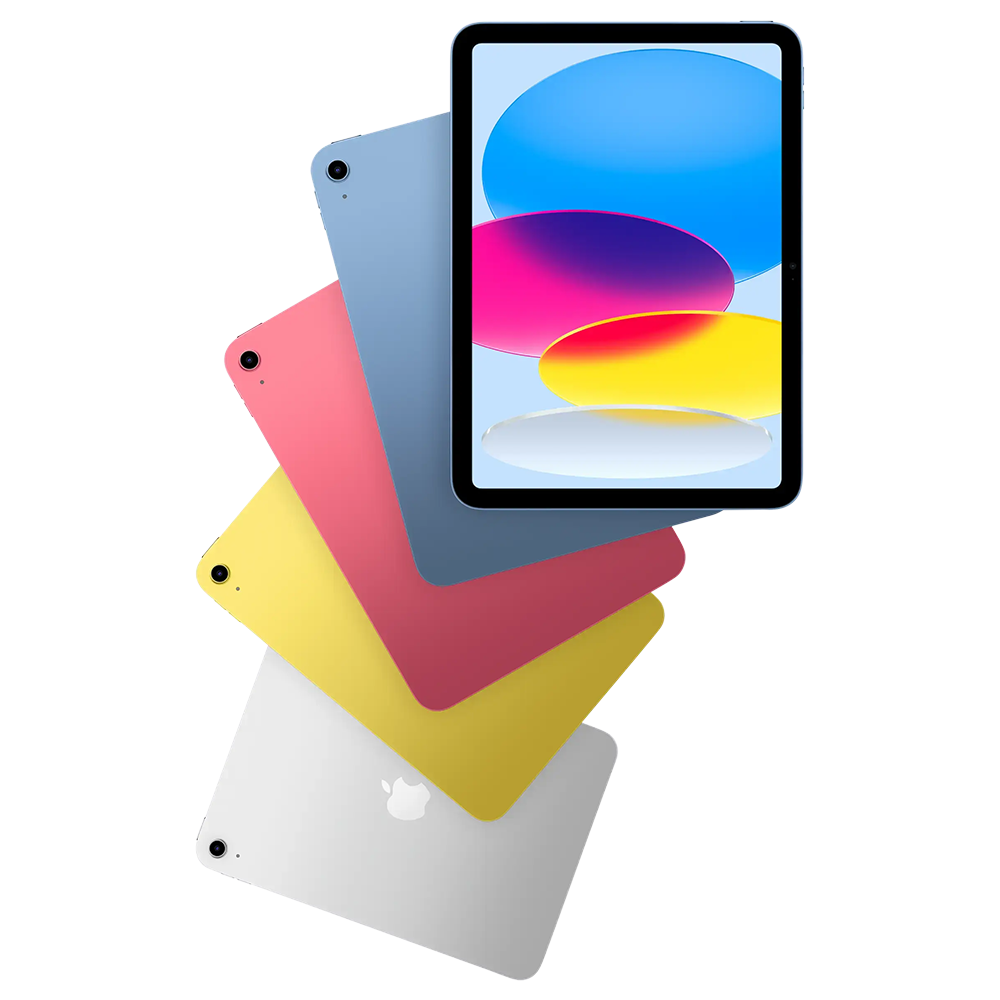
Before you start
This course assumes you can wake the iPad, swipe up to go Home, open an app, and connect to Wi-Fi. If any of that feels shaky, take a few minutes with the first course before continuing. The skills you built there are the foundation for everything in this one.
Have your iPad in front of you and a working Wi-Fi connection. Some modules send you to a website (gmail.com, a map search), so being online matters. If you do not have Wi-Fi yet, go back to Module 1.5 in the first course and set it up first.
You do not need an Apple ID for any module in this course. We are deliberately staying away from features that require one (Messages, FaceTime, iCloud, App Store sign-in) so you can get more out of the iPad without creating a new account just yet. Everything here works on a brand-new device.
How this works
Same four-step rhythm as the first course. Read, watch, try, check. If you finished Course One, this will feel familiar.
- 01Read the module
Each module is short. Read the lesson sections at your own pace. Re-read whatever you need to.
- 02Watch the short video
Every module has one video that shows the lesson on a real device. A few minutes long, never more than that.
- 03Try it on your iPad
Stop and try each step on your own iPad as you go. Reading without doing does not stick.
- 04Check yourself
Each module ends with a short “Your Turn” list. Run through it before moving on.
Your course at a glance
Seven new modules. Each one stands on its own and builds on the gestures and settings you already know. Together they take you from “I can use my iPad” to “I know my way around it.”
Make It Yours: Customize the Home Screen
Typing Like a Pro: Dictation, Copy & Paste
Browse the Web with Safari
Stay Safe Online: Spotting Scams
Camera, Screenshots & the Photos App
Built-in Apps Without an Account
Sign Into Google for Email & Work
Make It Yours: Customize the Home Screen
The Home Screen is yours. You can move apps around, group them into folders, add widgets that show information at a glance, and tidy up the Dock at the bottom. This module reinforces the long-press and drag gestures from the first course.
By the end of this module you will enter “wiggle mode,” move an app to a new spot, create and rename a folder, find the App Library, add a widget, and add or remove an app from the Dock.
Step through it with your iPad in hand
Enter Wiggle Mode
Touch and hold any empty area of the Home Screen for about a second. The app icons start to wiggle. That is called wiggle mode (or Edit Home Screen). It means everything is unlocked and you can move things around.
When you are done, tap an empty area or the Done button at the top of the screen to lock it back up. You can also leave wiggle mode at any time by swiping up to go Home.
Move an App
While in wiggle mode, drag any app to a new spot on the screen. The other apps slide out of the way to make room.
Drag an app all the way to the right edge and pause. The screen flips to the next page. That is how you move an app between pages. Drag back to the left edge to bring it back. There is no wrong place to put an app.
Make a Folder
Folders group similar apps together so the Home Screen feels less cluttered.
- 01Enter wiggle mode.
- 02Drag one app on top of another. A folder appears with both apps inside.
- 03Tap the name above the folder to rename it (try “Tools” or “Fun”).
- 04Drag more apps into the folder if you want.
- 05Tap outside the folder, then tap Done.
To open a folder later, just tap it. To take an app out, open the folder, enter wiggle mode, and drag the app out.
The Dock at the Bottom
The strip of apps at the very bottom of the screen is the Dock. It stays visible no matter which Home Screen page you are on. Use it for the apps you open most often (Safari, Photos, Notes).
To add an app to the Dock, drag it from the Home Screen into the Dock. To remove one, drag it back out. The Dock holds up to about 15 apps.
Add a Widget
Widgets are little tiles that show information without opening an app, like the weather, your next reminder, or the current time in another city.
- 01Touch and hold an empty spot on the Home Screen until icons wiggle.
- 02Tap the Edit button in the top-left, then tap Add Widget.
- 03Pick an app from the list (Weather is a good first one).
- 04Choose a size, then tap Add Widget.
- 05Drag the widget to where you want it. Tap Done.
To remove a widget later, enter wiggle mode, tap the minus sign on the widget, and confirm.
The App Library
Swipe sideways past your last Home Screen page. You land on a screen of apps grouped into categories. That is the App Library. Every app on the iPad lives here, even apps you have removed from the Home Screen.
Use the search bar at the top to find any app by name. Touch and hold an app and choose “Add to Home Screen” to put it back in the main rotation.
Removing an App from the Home Screen
If you have an app you never use, you have two choices: remove it from the Home Screen (still available in the App Library) or delete it from the iPad entirely.
Touch and hold the app, tap Remove App, then choose:
- “Remove from Home Screen” — keeps the app, just hides it.
- “Delete App” — removes it completely.
When in doubt, pick Remove from Home Screen. You can always bring the app back from the App Library.
Your Turn
Run through the checklist below. Take your time, none of these changes are permanent.
Typing Like a Pro: Dictation, Copy & Paste
The iPad keyboard does a lot more than spell out letters. This module covers the small tricks that make typing faster and less frustrating: dictation, copy and paste, undo with a finger swipe, and the floating keyboard for when you are typing one-handed.
By the end of this module you will use dictation to type with your voice, copy and paste a piece of text, undo a mistake with a three-finger swipe, and shrink the keyboard into a floating one when you want it out of the way.
Step through it with your iPad in hand
The Predictive Bar
Open the Notes app and start a new note. As you start typing a word, look at the row of suggestions just above the keyboard. The iPad is guessing what word you are typing.
Tap any suggestion to insert it instantly. This saves a lot of taps once you get used to glancing up at the bar.
Dictation: Type With Your Voice
Look at the keyboard. On the bottom right, near the spacebar, find the small microphone icon. Tap it.
The iPad starts listening. Speak normally, like talking to a person. The words appear as you say them. Say “comma” or “period” to add punctuation, and “new line” or “new paragraph” to break the text.
When you are done, tap the keyboard icon to switch back to typing. Dictation works in any app where you can type, no Apple ID required.
Select, Cut, Copy, and Paste
Imagine you wrote a sentence in Notes and want to move it somewhere else. Here is how:
- 01Touch and hold a word until it is highlighted in blue.
- 02Two little handles appear on either side of the highlight. Drag them to expand the selection over the whole sentence.
- 03A small black bar pops up with options: Cut, Copy, Paste, and others.
- 04Tap Copy. The sentence is now stored in the clipboard.
- 05Open another app (or another spot in Notes), touch and hold an empty space, and tap Paste. The sentence appears.
Cut works the same as Copy except it removes the original. Paste works once or many times — the clipboard remembers the last thing you copied.
Undo With a Three-Finger Swipe
Type something into Notes and then swipe to the left with three fingers across the screen. The last thing you typed disappears. That is undo.
Swipe to the right with three fingers to redo it. This works in most apps that involve typing. It is much faster than holding down the delete key.
The Floating Keyboard
The full-size iPad keyboard takes up a lot of the screen. If you want a smaller, one-handed keyboard, do this:
- 01Pinch the keyboard with two fingers like you are squeezing it together.
- 02The keyboard shrinks into a small floating version that you can drag around with the gray bar at the bottom.
- 03To expand it back to full size, pinch outward with two fingers on the small keyboard.
The floating keyboard is great for typing in landscape (sideways) when you only want to use one hand.
Trackpad Mode (Hidden Cursor Trick)
This one trips up almost everyone the first time they discover it.
Touch and hold the spacebar. Do not lift your finger. After about a second, the keyboard letters fade out and the whole keyboard becomes a trackpad. Move your finger around and the cursor in your text moves with it.
This is the easiest way to put the cursor exactly where you want it in a long block of text. Lift your finger when the cursor is in place.
Your Turn
Open Notes, start a fresh note, and run through the list below. None of this requires an account, and you cannot break anything.
Browse the Web with Safari
Safari is Apple’s built-in web browser. It is the blue compass icon on the Home Screen. Once you are comfortable with tabs and bookmarks, you can do most of the everyday things people use a computer for, all from the iPad.
By the end of this module you will type a web address into Safari, search the web, open and close tabs, save a bookmark, use Reader View to remove clutter from a long article, and zoom in on a page that is too small to read.
Step through it with your iPad in hand
Open Safari and Find the Address Bar
Tap the blue compass icon on the Home Screen (in the Dock by default). Safari opens.
The long bar at the top is the address bar. It does two jobs:
- Type a website name (like apple.com) and tap Go on the keyboard — it goes to that site.
- Type a question or words (like “weather Vernon NJ”) and tap Go — it searches the web for you.
You do not need to know the difference. Type either one and Safari figures it out.
Open a New Tab
Tabs let you have multiple websites open at once, like opening multiple pages of a magazine.
Tap the plus (+) sign at the top right of Safari. A new tab opens with a blank page. Type something in its address bar and you are off to a new site.
To see all your open tabs at once, tap the icon that looks like two overlapping squares (top right). You can tap any one to switch to it.
Close a Tab
From the tab overview (the two overlapping squares), tap the small X on any tab card to close it. Or, while you are looking at a tab, tap and hold the two-squares icon and choose Close This Tab.
Closing tabs you no longer need keeps Safari fast and tidy. There is no harm in having a few open at a time though.
Save a Bookmark
Bookmarks are saved shortcuts to websites you visit often, so you do not have to type the address every time.
- 01Go to a website you want to save (try vernonmpc.org).
- 02Tap the Share button — the square with an up-arrow at the top right.
- 03Scroll down in the menu and tap Add Bookmark.
- 04You can rename it if you want. Tap Save.
To open your bookmarks later, tap the open-book icon at the top of Safari and pick the bookmark from the list.
Reader View
On long articles with lots of ads and clutter, Reader View shows just the words and pictures, like a clean printed page.
Tap the small “Aa” in the address bar (left side). Tap Show Reader. The page reformats into a calm, easy-to-read layout. Tap Aa again and Hide Reader to return to the normal page.
This is one of the most loved features in Safari. Use it any time a website feels overwhelming.
Zoom and Adjust Text
If a website looks too small, you have two ways to zoom:
- Pinch outward on the page with two fingers (just like with photos). Pinch inward to zoom back.
- Tap the “Aa” in the address bar and use the bigger A or smaller A buttons.
The Aa setting sticks for that website. Next time you visit, it remembers your preference.
Going Back and Forward
At the top-left of Safari are two arrows: a left arrow (back) and a right arrow (forward). Tap back to return to the previous page. Forward only lights up after you have gone back at least once.
If you ever feel lost in Safari, you can usually tap back a few times to return to where you started.
Your Turn
Open Safari and run through the list. Pick any website you like for the bookmark step.
Stay Safe Online: Spotting Scams
The internet is full of useful things, but also full of people who try to trick you out of money or personal information. This module is about recognizing the most common scams — the fake “Your iPad has a virus” pop-ups, the suspicious emails, the pretend bank alerts — and knowing what to do (and what not to do) when you see one.
By the end of this module you will recognize the look of a phishing page, identify a fake virus warning, understand what the padlock icon means, and know the safe response when something online feels off.
Step through it with your iPad in hand
The Big Rule
Apple will never send you a security warning in your web browser. Your iPad does not scan for viruses. So any pop-up that says “Your iPad is infected!” or “Call Apple Support now!” is fake. Always.
Real Apple notifications appear in your Settings app or in the system area at the top of the screen. They never appear inside Safari, and they never ask you to call a phone number.
What a Fake Virus Pop-up Looks Like
Common signs:
- Bright red or yellow background and big warning letters.
- A loud beeping sound or flashing animation.
- A countdown timer telling you to act fast.
- A phone number to call “Apple Support” (Apple does not ask you to call them this way).
- A button that says “Scan now” or “Fix now.”
If you see any of this in Safari, do not tap anywhere on the pop-up. Do not call the number. Do not tap the X (some fake X buttons take you to another scam page).
What To Do Instead
When a fake warning appears:
- 01Do not tap on the pop-up itself.
- 02Tap the two-overlapping-squares tab icon at the top of Safari.
- 03Find the tab with the fake warning and swipe its card upward to close it. Or tap the X on the tab card.
- 04If the pop-up keeps coming back, fully close Safari from the App Switcher (you learned this in Module 1.3) and open it fresh.
- 05Open Settings, tap Safari, then tap “Clear History and Website Data” to wipe any leftover trace.
You are now safe. The pop-up was just a webpage, not anything actually on your iPad.
The Padlock Icon
Look at the address bar in Safari. To the left of the website address you will often see a small padlock icon. That means the connection is secure (the data going between your iPad and the website is scrambled so others cannot read it).
A padlock does not mean the website is honest — a scam site can also have a padlock. But the absence of a padlock on a page that asks for a password or credit card is a serious warning sign.
Suspicious Emails (Phishing)
If you check email in a web browser, you will eventually see a message that pretends to be from your bank, the post office, Amazon, or Apple. The trick is called phishing.
Watch for these signs:
- Strange greeting like “Dear Customer” instead of your name.
- Urgent language: “Your account will be closed in 24 hours!”
- Spelling and grammar mistakes.
- A link or button asking you to “verify” your password.
- A sender address that looks almost right but not quite (paypa1.com instead of paypal.com).
The safe move: do not tap any link in the email. If you think it might be real, open Safari, type the company’s address yourself (paypal.com), and check your account directly.
Passwords That Actually Help
A few simple rules go a long way:
- Long beats clever. “BlueRiverHouseTea” is much stronger than “P@55w0rd!”
- Different password for every important account. If one site gets hacked, only that one is affected.
- Never share a password by email, text, or over the phone. No real company will ever ask you for it.
- If you write passwords down, keep the paper somewhere private — a drawer at home is safer than a sticky note on the iPad.
When in Doubt, Walk Away
If something on a website or in an email feels off — too urgent, too perfect, too scary — close the page and ask someone you trust. A son, daughter, neighbor, or staff member at VMPC. There is no shame in pausing. Scammers count on people not pausing.
You are never going to get in trouble for closing a page or ignoring an email. The only mistake is tapping fast when you should have stopped.
Your Turn
This module does not have a hands-on checklist because we do not want to send you to a real scam page. Instead, run through this short reflection.
Camera, Screenshots & the Photos App
The iPad has two cameras (one in front, one in back), and a Photos app that holds everything you ever capture. This module covers taking a photo, recording a short video, taking a screenshot of whatever is on the screen, and finding and deleting your pictures later.
By the end of this module you will take a photo, switch between front and rear cameras, record a short video, take a screenshot, find a photo in the Photos app, mark up a screenshot, and delete a photo you no longer want.
Step through it with your iPad in hand
Open the Camera
On the Home Screen, find the gray icon with the camera lens. Tap it. The Camera app opens to whatever mode you used last (usually Photo).
Quick tip: even when the iPad is locked, you can swipe to the left on the lock screen to jump straight to the camera. Handy when you need to capture something fast.
Take a Photo
With the Camera app open in Photo mode, point the iPad at whatever you want to capture. The image appears on the screen.
Tap the big white circle at the side of the screen (or use a volume button on the side of the iPad) to take the picture. You will hear a small shutter sound and a tiny version of the photo flashes in the corner. That is your photo, saved.
Switch Modes
Look at the row of words next to the shutter button: Photo, Video, Portrait, Square, Pano (and a few more depending on the model). Swipe through them to switch modes.
- Photo: a regular still picture.
- Video: tap the red button to start recording, tap again to stop.
- Portrait: blurs the background, great for photos of people.
- Pano: hold the iPad steady and slowly turn it across a wide scene.
Try one or two so you know what they look like. You can always switch modes later.
Front vs. Rear Camera
There is an icon with two arrows curving around a camera near the shutter button. Tap it to switch to the front camera (the one looking at you).
The front camera is for selfies and video calls. The rear camera takes higher-quality photos. Tap the icon again to switch back.
Take a Screenshot
A screenshot is a picture of whatever is currently on your iPad’s screen. Useful for saving a website, an article, or a confusing message to ask someone about.
Press the Top button (top-right edge) and either Volume button (left edge) at the same time, then release them quickly. The screen flashes white and a small thumbnail appears in the bottom-left corner.
- Tap the thumbnail to mark up the screenshot (draw on it, crop, add an arrow).
- Or just leave it — it saves automatically to the Photos app.
This is the same Top + Volume combination you use to restart the iPad, but you only need to press and release, not hold.
Open the Photos App
Go Home and find the Photos app (a multi-color flower icon). Tap it. Every photo, video, and screenshot you have ever taken on this iPad is here.
The main view shows your most recent pictures. Pinch outward with two fingers to make the thumbnails bigger, or pinch inward to see more at once. Tap any picture to view it full-screen.
This works without iCloud or any account. The photos are stored on the iPad itself.
Mark Up a Photo
Open any photo in the Photos app. Tap Edit at the top right. Tap the marker icon (a small pen tip in a circle). You can now draw, write, and add arrows on top of the photo.
This is great for circling something on a screenshot before showing it to someone, or pointing out a place on a map. When you are done, tap Done to save.
Delete a Photo
If you took a blurry shot or a screenshot you no longer need, open the photo and tap the trash can icon (bottom of the screen). Confirm by tapping Delete Photo.
Deleted photos go into the Recently Deleted album for 30 days before they are gone for good. Find it by tapping Albums at the top, scrolling to the Utilities section, and opening Recently Deleted. You can recover anything from there if you change your mind.
Your Turn
Try the full flow on your own iPad. None of this requires an account.
Built-in Apps Without an Account
The iPad ships with a handful of small apps that are quietly excellent and work without signing into anything. This module is a guided tour of the ones you will reach for week after week: Maps, Calculator, Notes, Clock, Weather, and Reminders.
By the end of this module you will search for a place in Maps, do quick math (and handwritten math) in Calculator, write a private note in Notes, set an alarm and a timer in Clock, check the forecast in Weather, and write a single reminder.
Step through it with your iPad in hand
Maps: Find a Place
Find the Maps app on the Home Screen (a folded paper-map icon). Tap it.
Tap the search bar at the top and type a place name (try Vernon Multipurpose Center, or your nearest grocery store). Tap a result. The map zooms in and shows you where it is, plus a Directions button.
Tap Directions to see how to get there from your current location, with options for driving, walking, or transit. You do not need an Apple ID for any of this. Maps just needs Wi-Fi or location access.
Calculator: Quick Math
Apple finally added a Calculator app to the iPad in iPadOS 18. Find the Calculator icon on the Home Screen and tap it.
The basic mode is just like the calculator on a phone or a desk: type numbers and tap the operation buttons. There is also a Scientific mode (turn the iPad sideways or tap the menu icon) for more advanced functions.
Try: 47 × 12, then ÷ 4. The result is on the bright top line.
Calculator: Math Notes
Here is the trick that makes the iPad Calculator special. Tap the icon at the top-left that looks like a small calculator with lines, and choose Math Notes.
You can now write a math problem with your finger (or an Apple Pencil if you have one), and the iPad solves it in your handwriting as you type the equals sign.
Try writing: 3 + 4 = and watch the answer appear in your own handwriting. Try a longer one: 12 × 7 + 5 =. Math Notes is great for grocery budgets, splitting a bill, or any quick figuring without picking up a pencil.
Notes: A Private Notebook
Find the yellow Notes icon. Tap it. Tap the pencil-and-pad icon at the top-right to start a new note.
Type anything: a grocery list, a phone number, an address. Tap the share button at the top to print the note or send it through Mail.
If you do not sign into iCloud, every note stays on this iPad only. Nothing leaves the device. That makes Notes a perfectly private notebook even before you have an Apple ID.
Clock: Alarm and Timer
Find the Clock app (a white clock icon). Tap it. The screen has four buttons at the bottom: World Clock, Alarm, Stopwatch, and Timer.
- Alarm: tap the plus to add a new alarm. Pick a time, tap Save. The alarm goes off at that time even if the iPad is locked.
- Timer: tap the time and pick a duration (try 5 minutes), then tap Start. The countdown runs and chimes when finished.
Use the Timer for cooking, taking medicine, or any short break. The Alarm is great for medication reminders or appointments.
Weather: Today and Tomorrow
Find the Weather app. Tap it. You see today’s forecast for your area, with the temperature, conditions, and an hour-by-hour breakdown.
Scroll down for the 10-day forecast, sunrise and sunset times, humidity, and air quality. Tap the menu icon at the top-left to add another city, useful if you have family in another state.
No account needed. Weather pulls live data over Wi-Fi.
Reminders: One Quick To-Do
Find the Reminders app (a white circle on a beige background). Tap it. Tap New Reminder at the bottom.
Type something simple, like “Water the plants” or “Call Maria.” Tap the small i icon next to it to add a date and time. The iPad will pop up the reminder when that time comes.
Reminders work on the iPad even without an account. They just stay on this device.
Your Turn
Run through the list. Try one feature in each app to get a feel for them.
Sign Into Google for Email & Work
An Apple ID is one way to use the iPad, but it is not the only way. A free Google account opens up Gmail (email), Google Drive (files), Docs (writing), and YouTube (video) — all in Safari, no app installs required. This module walks you through signing in once and then making it one tap away.
By the end of this module you will open Safari, sign into your Gmail account, read and write an email, sign into Google Drive, and bookmark both pages so you can find them again with a single tap.
Step through it with your iPad in hand
Why a Google Account, Not Just Apple
An Apple ID is required for Apple-specific features (the App Store, Messages, FaceTime, iCloud). A Google account does a different set of jobs: free email at gmail.com, document storage and writing through Google Drive and Docs, watching and saving videos on YouTube, and signing into many other websites that accept Google sign-in.
They are not the same thing. Most people end up with both eventually. This course does not require an Apple ID, so we are going to use Google to do the things people most often want their iPad for: email and saving work.
Open Safari and Go to Gmail
Tap Safari from the Dock. In the address bar at the top, type:
gmail.com
and tap Go on the keyboard. The Gmail sign-in page appears.
Sign In
Type your Gmail address (the part before @gmail.com is your username, then add the @gmail.com part). Tap Next.
Type your password carefully. Tap Next again. The first time, Google may ask you to verify it is really you with a code sent to your phone or another email — follow the prompts.
If you do not have a Google account yet, tap Create account at the bottom. The signup is short: name, date of birth, and a password you choose. Use a password you will remember (long and simple beats short and complicated).
Read an Email
After you sign in, your inbox loads. The most recent emails are at the top. Tap any one to open it.
To go back to the inbox, tap the arrow at the top-left. To delete an email, tap the trash can. To reply, tap the back-arrow icon at the top of the message.
If the page looks small, pinch outward to zoom in (you learned this in Module 2.3).
Write an Email
Tap the pencil icon (or Compose) to start a new message. Three boxes:
- To: type the recipient’s email address.
- Subject: a short summary (“Saying hi”).
- The big body box: your message.
When you are done, tap Send (a paper-airplane icon). The email is on its way. Use Module 2.2 tricks: dictate the body if typing is slow, or use copy-paste if you need to insert text from somewhere else.
Bookmark Gmail
Once you are signed in, you do not want to type the whole login again every time. Bookmark it.
- 01Make sure you are on the gmail.com page.
- 02Tap the Share button (square with up-arrow at the top right).
- 03Tap Add Bookmark, then Save.
Now Gmail is one tap away in your Safari bookmarks (the open-book icon).
Add Gmail to the Home Screen
Even faster: put Gmail right on your Home Screen so it looks like an app.
- 01From the Gmail page, tap the Share button.
- 02Tap Add to Home Screen.
- 03Edit the name if you want (“Gmail” is fine), then tap Add.
A Gmail icon now lives on your Home Screen. Tap it any time and Safari opens straight to Gmail. This is the closest you can get to a Gmail app without going through the App Store.
Google Drive: Your Files in the Cloud
Once you have a Google account, you also have Google Drive. It is free storage for files, photos, and documents.
In Safari, type drive.google.com and tap Go. It signs you in automatically using the same account you used for Gmail. From here you can upload a photo or document, create a Google Doc to write in, and share files with others by email.
Bookmark Drive too, or add it to the Home Screen. Same steps as for Gmail.
Sign Out (Important)
If you ever use a public iPad (a library, a community center) sign out of Google when you are done. Tap your profile picture in the top-right of Gmail or Drive, then tap Sign out.
On your own iPad at home, you do not need to sign out. Stay signed in for convenience.
Your Turn
Run through the list with your real Google account. If you do not have one yet, create one during step 2.
You went further.
Your iPad is really yours now.
You can customize your Home Screen, type with your voice, browse the web safely, take and edit photos, navigate with Maps, calculate, and use Gmail in Safari. That covers most of what people use a computer for. From here, the rest is practice and curiosity.